
Rivet shelving setup - how do you make it stable?
Boltless rivet shelving goes up in an hour, but real stability comes from the right assembly order. This guide walks through the step-by-step setup, explains shelf and bay load, the diagonal brace and when a wall anchor is mandatory.
View rivet shelvingHow do you assemble rivet shelving step by step?
Boltless rivet shelving simply slots together: angle uprights and shelf beams click into pre-punched slots without screws. The key is to pre-assemble the unit lying flat and raise it only afterwards, so all four feet touch the floor at the same time.
Start with two side frames, join them with the top and bottom shelf, then check the diagonal with a tape measure. Only when both diagonals are equal is the bay square, and the intermediate shelves will drop in without binding or stress.
- Check the site: level, load-bearing floor, never let the rack rock on uneven ground.
- Slot two side frames flat, push the corner clips fully home to the stop.
- Fit top and bottom shelf, raise the frame, measure both diagonals.
- Hang intermediate shelves at the chosen pitch and lock the securing clips.
- Level the feet with adjustable glides or shims using a spirit level.
What do shelf load and bay load mean?
The shelf load is the maximum weight per individual level, the bay load is the total of all levels in one bay. Under DIN EN 15635 both figures must be permanently marked on the rack and must never be exceeded, not even briefly.
The stated shelf load only applies to an evenly distributed surface load. A heavy point load in the centre of a shelf can deflect it well below the nominal rating. Put heavy goods low down: it lowers the centre of gravity and improves tip resistance.
When do I need bracing and wall anchoring?
A single rivet rack without a back panel is soft across the shelf axis. A diagonal brace on the rear or a slotted back panel stiffens the bay and stops it racking under load. Without this bracing the unit sways sideways and loses stability.
As soon as the ratio of height to depth becomes critical, wall anchoring or coupling several bays together is required. As a rule of thumb, free-standing racks from a ratio of about 5:1 (height to depth) must be secured against tipping.
- Fit the diagonal brace or back panel per bay - never skip it to save time.
- Anchor tall, narrow racks from about 5:1 height to depth to a load-bearing wall.
- If the wall cannot bear load, couple several bays or use outrigger feet.
- Provide impact protection on traffic routes (forklift, pallet truck).
- Have the rack inspected yearly to DIN EN 15635 by a competent person.
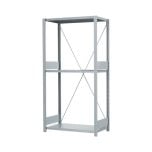 Shelving and accessories
Matching shelves, back panels and wall anchors for your storage needs.
View productsFrequently asked questions
How much does each rivet shelf typically carry?
Depending on size, boltless rivet shelving carries roughly 150 to 350 kg shelf load per level with an evenly distributed load. The exact figure is on the load label of the specific model.
Do I really need to wall-anchor rivet shelving?
Free-standing, tall and narrow racks from about 5:1 height to depth must be secured against tipping, using wall anchors, coupling several bays or outrigger feet. Low, deep racks often manage without.
Why is the diagonal brace so important?
The diagonal brace or back panel stiffens the bay across its width and stops it racking under load. Without this bracing the unit sways sideways and loses its load capacity.
Does rivet shelving need to be inspected?
Yes. DIN EN 15635 requires at least one inspection per year by a competent person, backed up by regular visual checks by the operator.
Looking for shelving for your store?
We supply boltless rivet shelving with clearly stated shelf and bay loads, diagonal bracing and matching wall anchors - quick and easy to assemble.
Standards-based
Load ratings stated to DIN EN 15635.
Boltless
Fast slot-together assembly, no screws.
Stable
Diagonal brace and wall anchors included.
Selection help
We help you choose the right products; technical details are clarified with the manufacturer.