
How do you hand solder correctly? Basic technique step by step
Clean hand soldering follows a fixed order: first heat the pad and component lead with the tip, then feed solder to the joint, not onto the tip. With the right temperature, a clean tinned tip and flux you get a shiny, concave joint.
To soldering guideHow do you solder step by step correctly?
In hand soldering, heat goes into the joint first, not into the solder. The tip heats the pad and the component lead at the same time, then the solder wire is fed to the heated spot. The solder melts at the joint itself and flows cleanly around pad and lead through the heat that is present.
The most common beginner mistake is to melt solder onto the tip and then dab the blob onto the spot. The flux boils off before it can work, and the result is a cold, poorly wetted joint. The correct way: tip and solder touch the spot from two sides, and the solder melts on the heated metal.
- Tin the tip: wet the clean tip with a little fresh solder so heat transfers well.
- Make contact: place the tip so it touches both the pad and the component lead.
- Heat: bring both metal surfaces up to soldering temperature for about a second.
- Feed solder: bring the wire to the joint, not onto the tip, and let it melt.
- Let it flow: add enough solder until a small concave fillet wets pad and lead.
- Remove solder: take the wire away first, then lift the tip.
- Hold still: let the joint solidify without movement, or it turns into a cold joint.
What temperature, tip and flux do you need?
A clean result depends on three things: the right temperature, a clean tinned tip and enough flux. For lead-free solder the tip temperature is usually 350 to 380 °C, because these alloys melt hotter than leaded ones.
The tip must be clean and tinned so heat transfers quickly. An oxidised, black tip barely conducts heat and forces you to heat longer. Between joints, wipe the tip on a damp sponge or brass wool and re-tin it right away. Flux, usually built into the solder wire as a core, dissolves oxides and makes the solder spread flat instead of balling up.
You can recognise a good joint by a smooth, shiny surface and a concave, slightly drawn-in fillet that fully wets pad and lead. With lead-free solder the surface may look a little duller, which alone is not a defect. See the solder joint inspection guide for grading details.
What beginner mistakes exist and how do you solder ESD-safe?
Most beginner mistakes come from the wrong order, too much solder or too much heat. The table below maps the typical mistakes to their cause and the fix.
| Mistake | Cause | Fix |
|---|---|---|
| Cold joint | too little heat, movement while setting | heat the spot, hold still |
| Too much solder | solder fed too long | use less, aim for a small fillet |
| Overheating | too high a temperature or too long | solder shorter, lower the temperature |
| Poor wetting | oxidised tip, little flux | re-tin the tip, add flux |
| Solder bridge | too much solder, tight pitch | reduce solder, remove the excess |
| Solder on the tip | solder on the tip, not the joint | feed solder to the heated joint |
Electronic components are sensitive to electrostatic discharge. Hand soldering is therefore done ESD-safe: a grounded soldering station, an ESD mat and a wrist strap at a grounded workspace. This lets charges drain in a controlled way instead of damaging the parts.
- Use a grounded soldering station with an equipotential tip.
- Bond the ESD mat and wrist strap to a common ground point.
- Handle parts on a dissipative surface, not on ordinary plastic.
- Check the grounding of mat and strap before you start.
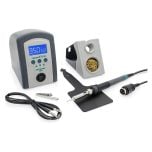 Choose the right station
Adjustable temperature and a grounded tip are the basis for clean hand soldering.
View products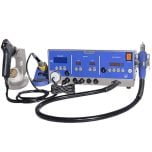
Frequently asked questions
Do you feed solder onto the tip or to the joint?
To the joint. First the tip heats the pad and component lead, then the solder wire is fed to the heated spot where it melts. Melting solder onto the tip boils off the flux and leads to cold, poorly wetted joints.
What temperature is right for hand soldering?
For lead-free solder the tip temperature is usually 350 to 380 °C, since these alloys melt hotter than leaded ones. More important than a high value is a clean, tinned tip so heat transfers quickly and the joint can be soldered in a short time.
How do you recognise a good solder joint?
A good joint is smooth, shiny and shows a concave, slightly drawn-in fillet that fully wets pad and lead. With lead-free solder the surface may look a little duller. Dull, grainy or bulbous joints point to a defect.
Hand soldering: the right equipment
From an adjustable soldering station and tips to flux and ESD equipment, we help you start soldering cleanly.
Practical
Proven basic technique instead of theory.
Selection help
We help you choose the right products; technical details are clarified with the manufacturer.
ESD-aware
Guidance for electrostatically safe work.
Selection help
We help you choose the right products; technical details are clarified with the manufacturer.