
How to crimp ferrules and pick the right crimp tool
A clean ferrule turns fine-stranded wire into a solid, contact-safe pin and stops the strands from splaying in a terminal. This guide shows how to size the cross-section, choose between four-indent, trapezoidal and hex crimp tools, and verify the crimp.
View crimp toolsWhat are ferrules for and why crimp them?
A wire ferrule bundles the individual strands of a fine-stranded conductor into one firm pin. Without a ferrule the strands splay inside a screw or spring terminal, single wires break off and the contact resistance rises. Under DIN 46228 the crimped ferrule forms a gas-tight, permanently contact-safe connection.
Crimping plastically deforms the metal sleeve around the strands with a defined force. The aim is a cold-welded, gas-tight zone with no air pockets, so oxidation cannot degrade the joint. Soldering does not replace crimping, because tin flows under clamping pressure and the connection works loose.
- Stops strands splaying and wires breaking at the terminal.
- Gives even contact pressure and low contact resistance.
- Colour coding speeds up cross-section identification.
- Twin ferrules take two conductors into one terminal.
Four-indent, trapezoidal or hex - which profile?
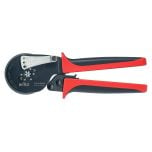
The crimp profile decides the shape and quality of the joint. Four-indent tools press from four sides and create a square cross-section that is evenly compacted all round and fits in any insertion orientation. Trapezoidal jaws deform the ferrule from three sides into a compact triangular shape.
For large cross-sections from about 6 mm² the hex profile is used, because it compacts the thick ferrule evenly all round instead of pinching it on one side. Always insist on a self-releasing ratchet lock: it frees the tool only once the crimp cycle is fully complete.
How do I size cross-section and ferrule length?
The ferrule must match the conductor cross-section exactly. An oversized ferrule cannot be crimped gas-tight, an undersized one destroys strands or will not slide over the wire. The nominal cross-section in mm² is usually printed on the cable insulation and sets both ferrule and die.
- Strip insulation only as far as the ferrule is long - no bare wire should protrude.
- Insert all strands fully into the ferrule without twisting them.
- The collar of an insulated ferrule faces the strip edge, metal flush with the strands.
- Pick ferrule length by terminal depth - 8, 10, 12 or 18 mm are common.
How do I check the finished crimp?
A correct crimp sits tight, shows a clean profile and cannot be pulled off the strands with moderate force. The pull test is the simplest field check: the ferrule must stay on the wire even under firm tension.
- Visual check: even profile, no burst or twisted ferrule.
- Pull test: ferrule resists tension without slipping.
- No single strand sticks out of the side of the ferrule.
- The insulation collar is not crimped in or torn.
Check the tool setting regularly, because a slipped ratchet permanently under-presses. Automatic self-adjusting crimpers remove the manual setup, as they adapt the press force to the cross-section.
Frequently asked questions
Can I crimp ferrules with pliers or side cutters?
No. Only a crimp tool with a defined four-indent, trapezoidal or hex profile produces a gas-tight, repeatable crimp. Improvised tools pinch the ferrule on one side and the contact becomes unreliable.
How do I find the right cross-section?
The nominal cross-section in mm² is printed on the cable insulation, and insulated ferrules are colour-coded to CENELEC - grey 0.75 mm², blue 2.5 mm², yellow 6 mm². Ferrule and die must match that cross-section.
Four-indent or trapezoidal - which is better?
Four-indent tools make a square crimp that fits in any insertion orientation and is the control-cabinet standard. Trapezoidal jaws compact more tightly and cover larger sections. Both are compliant when the profile matches the cross-section.
Do I need to tin the wire as well?
No. Tinned strands must not sit under clamping pressure, because the tin flows and the connection works loose. The ferrule replaces soldering and is the required solution for fine-stranded conductors in terminals.
Looking for the right crimp tool and ferrules?
We supply four-indent, trapezoidal and hex ratchet crimp tools plus insulated ferrules to DIN 46228 - colour-coded for every cross-section.
Standard-compliant
Ferrules to DIN 46228, colour-coded to CENELEC.
Repeatable
Ratchet tools with adjustable crimp force.
Gas-tight crimp
Contact-safe joint free from oxidation.
Selection help
We help you choose the right products; technical details are clarified with the manufacturer.